Windows L2TP/IPsec VPN Client
In this tutorial, well learn how to connect a Windows workstation to a Linux or Windows L2TP/IPsec VPN server running on the Crosspeer Cloud.
To do this, well be using Windows built-in VPN client.
Linux users can find a tutorial on how to Connect to an IPsec VPN using Linux here.
Step 1: Create a Connection
We will start by defining a new connection.
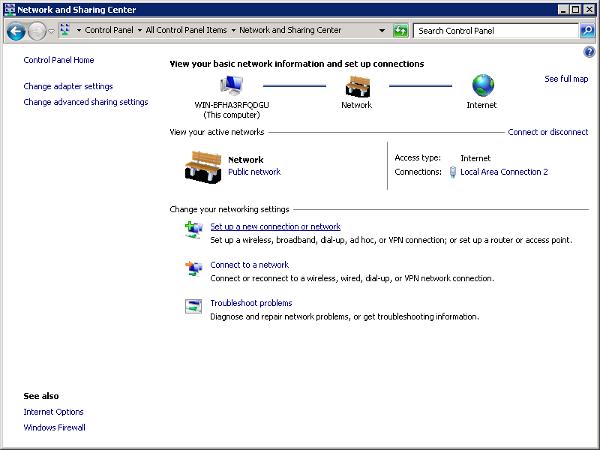
• Click Start, then Control Panel, and open the Network and Sharing Center. If you are using the Category View, you can find this under
Network and Internet.
• Select Set up a New Connection or Network:
To do this, well be using Windows built-in VPN client.
Linux users can find a tutorial on how to Connect to an IPsec VPN using Linux here.
Step 1: Create a Connection
We will start by defining a new connection.
• Click Start, then Control Panel, and open the Network and Sharing Center. If you are using the Category View, you can find this under
Network and Internet.
• Select Set up a New Connection or Network:
• Select Connect to a Workplace, and click Next. If prompted to choose an existing connection, select No, Create a New Connection.
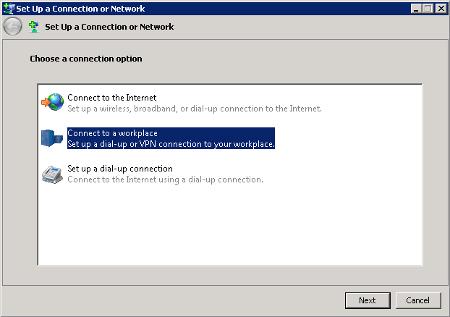
• You will be asked how you want to connect. Choose Use my Internet Connection (VPN)
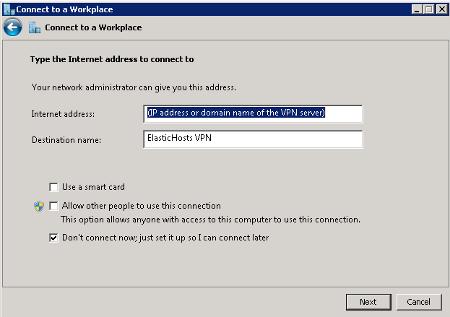
• When prompted, enter the IP address or domain name of your VPN server and check the option marked Dont Connect Now; just set it up
so I can Connect Later before clicking Next. We will need to edit some settings before we connect to this.
• When prompted, enter the IP address or domain name of your VPN server and check the option marked Dont Connect Now; just set it up
so I can Connect Later before clicking Next. We will need to edit some settings before we connect to this.
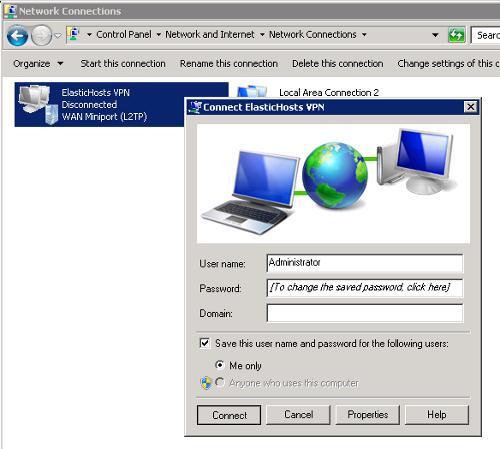
• Enter your VPN username and password. If you are connecting to a Windows VPN server, these will be your Windows username and
password for the remote server. Otherwise (for example if you have followed our guide to Creating Linux VPN server), this will be your
CHAP username and password.
Choose Create, and click Close at the next page.
password for the remote server. Otherwise (for example if you have followed our guide to Creating Linux VPN server), this will be your
CHAP username and password.
Choose Create, and click Close at the next page.
Step 2: Configure Security and Network Settings
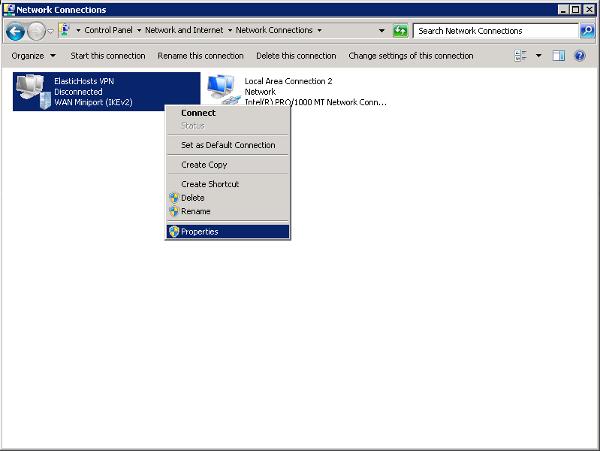
• Open the Network Connections page, by clicking Change Adapter Settings in the sidebar to the left of the Network and Sharing Center.
• You will see your new VPN connection listed. Right-click it, and select Properties.
• Open the Network Connections page, by clicking Change Adapter Settings in the sidebar to the left of the Network and Sharing Center.
• You will see your new VPN connection listed. Right-click it, and select Properties.
• On the Security tab, enter the drop-down menu labeled Type of VPN and select Layer 2 Tunneling Protocol with IPsec (L2TP/IPSec).
• On the same tab select Advanced Settings, then check the radio button labeled Use Preshared Key for Authentication.
• Enter the preshared key (also known as a PSK, or shared secret you have configured or been given for this server in the text box.
If your VPN server uses certificate authentication rather than a preshared key, you can leave this option alone but must instead download and install the client certificate. For this tutorial, we will use PSK authentication.
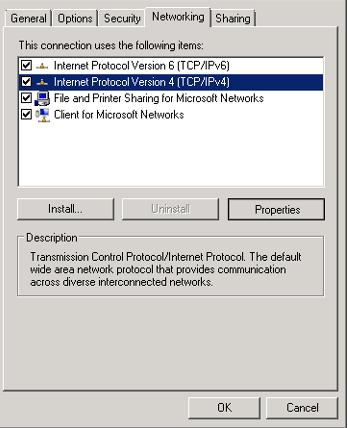
• On the Networking tab, highlight Internet Protocol Version 4 (TCP/IPv4), and select Properties.
• On the same tab select Advanced Settings, then check the radio button labeled Use Preshared Key for Authentication.
• Enter the preshared key (also known as a PSK, or shared secret you have configured or been given for this server in the text box.
If your VPN server uses certificate authentication rather than a preshared key, you can leave this option alone but must instead download and install the client certificate. For this tutorial, we will use PSK authentication.
• On the Networking tab, highlight Internet Protocol Version 4 (TCP/IPv4), and select Properties.
• You will see two settings asking whether to obtain an IP address or DNS server address automatically. Unless you have configured or been told
otherwise, you can leave these untouched.
• Select Advanced. If you only mean to use the VPN to communicate with servers inside your Crosspeer Cloud VLAN, make sure that the box
checked Use Default Gateway on Remote Network is cleared.
• If you wish to use the VPN for browsing, make sure it is checked. Be careful! If the remote server does not allow this then connecting to the VPN
with this box checked will cause you to lose your Internet connection.
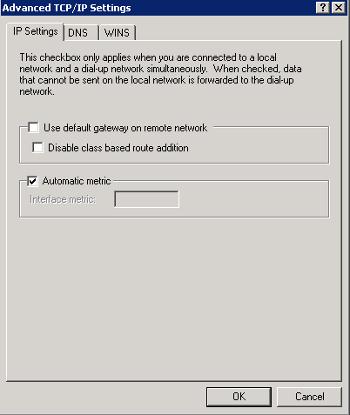
Checking this box will cause your internet connection to pass through the VPN by default, routing all traffic through the VPN unless a static route is created to specify otherwise.
Step 3: Connect to the VPN
Simply right-click the connection, and click Connect.
Step 3: Connect to the VPN
Simply right-click the connection, and click Connect.
Thats all - you should now be connected to the VPN server.